Sunday, July 27, 2014

Rosy Blackberry Cobbler


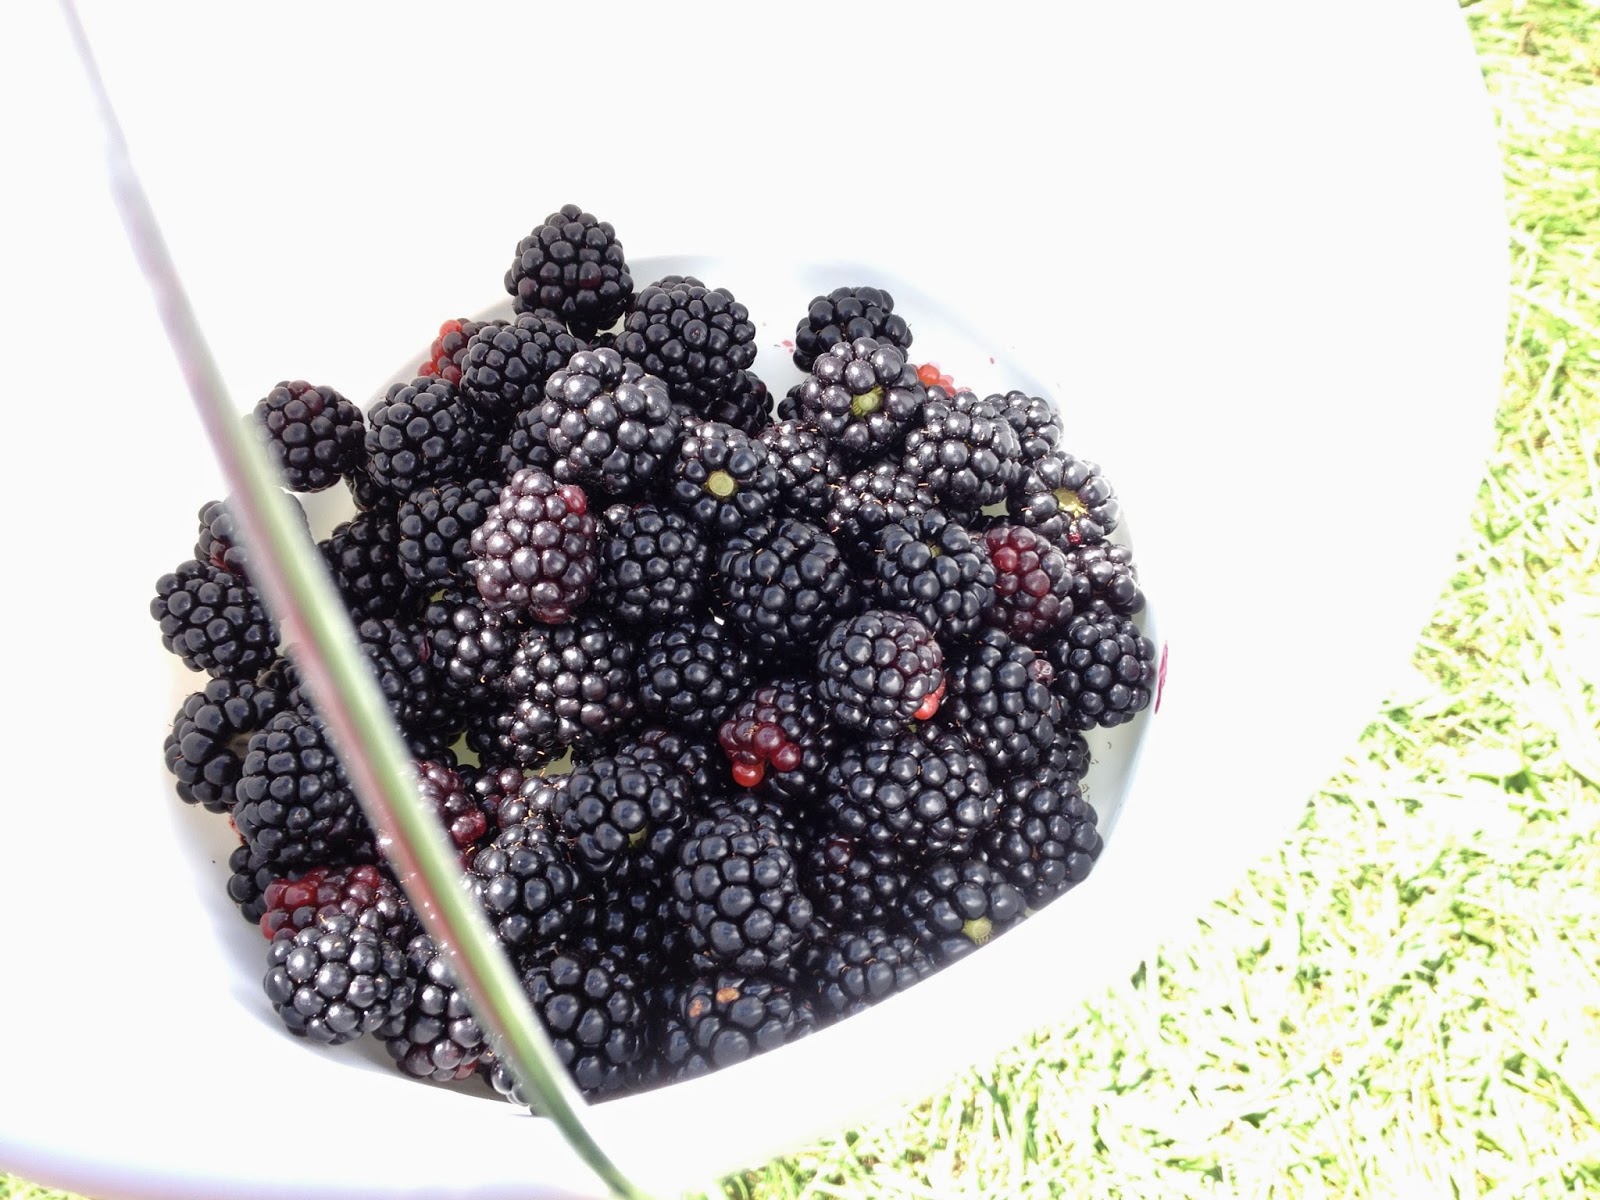
Packed with summer-fresh berries, sliced peach, and rhubarb, this cobbler features a silky buttermilk topping. Two lemons' worth of zest marries happily with the fruits, transporting you to a sun-dappled orchard in which you romp through brambles, mouth stained with purple. I made this cobbler after a berry-picking expedition at Homestead Farm in Poolesville, Maryland.


Ingredients


1 stick butter
2 lemons

4 cups blackberries
2 peaches, thinly sliced
2-3 stalks rhubarb, sliced
3/4 cup sugar
dusting of grated nutmeg
dash or two of cinnamon
dash of ground ginger
3 Tbsp cornstarch

2 1/2 cups flour
3/4 cups sugar
dash or two of cinnamon
1 Tbsp baking powder
1 tsp salt
2 cups buttermilk


Process


Preheat the oven at 350.

Get out a 9 x 13 baking pan. No need to grease!

Melt the stick of butter in a small saucepan. When mostly melted, with one thin rectangle bobbing in its golden bath, remove from heat. The rectangle will vanish into its hot tub.

zest both lemons, producing a tinselly heap. Cut one of the lemons in half.

Toss fruit into a large bowl. Add the sugar, nutmeg, cinnamon, ginger, and cornstarch. Toss with hands to combine. It's going to be glorious! Add half the lemon zest and half the melted butter. Toss some more. Oh yes!

Pour the fruit into the baking pan, spreading it so that it's even.

In another bowl, combine the flour, sugar, cinnamon, baking powder, and salt. Add the other half of the lemon zest. Pour in the butter and buttermilk and fold into the flour. Batter will be slightly lumpy. No overmixing!

Spread the batter over the fruit. In typical Toppled Chef style, I scooped and spread it with my bare hands. It worked out pretty well.

Bake for 45-55 minutes, until fruit is bubbling and top is golden brown.

Pull out and let cool on a wire rack. I'd eat this the next day for breakfast, but you can always serve hot with a scoop of ice cream.


Notes


  • For the flour, I used 1 cup white and 1 1/2 cups white wheat, with a healthy shaking of flax, which is why you see speckles in the photo. You don't have to be this granola. However, any combination of flours should work. The butter and the buttermilk will ensure a tender crust.
  • Likewise, you can use any combination of fruits. I happen to love the earthy blackberries jazzed with rubescent stalk fruit and mellowed with peach, but blueberry-strawberry-nectarine would be just as good.
  • What kind of cobbler is this? It isn't a cakey cobbler, where the dough rises through the fruit, but the topping isn't quite a biscuit topping, as it's too runny to form mounds. It's more of a lazy fruit pie with a biscuity slump on top. This works for the Tipsy Crumpet!
  • Note that the knife test doesn't work to test doneness. I pulled the cobbler out of the oven after 30 minutes because the knife came out clean. The next morning, my heart sank as I spooned out a wad of fruit clumped with undercooked batter. It was edible, but I had to put the cobbler back into the oven for another HOUR to get it to an acceptable level of non-rawness. This did the trick, in case the same kitchen pratfall occurs to you.
  • Some people like a sugary cobbler. Not I! The 1 1/2 cups of sugar in this recipe go toe-to-toe with the double whammy of lemon zest and a heap of rhubarb. If you like your dessert to feel more like a slap on the face, this is the one for you.
  • This makes a delightful Sunday breakfast.

Verdict


4 stars. Quite good, if you like your cobbler topped with a tender crust and filled with the textures, scents, and colors of summer.

Saturday, July 26, 2014

Tangy Lemon-Herb Salad


This herbaceous salad dances on your tongue with a combination of summer greens, lemon, artichoke brine, and salt. You'll swoon, you'll eat more, you'll want only salad for dinner, you'll forget about dessert. If the Tipsy Crumpet would rather eat salad than anything else, you KNOW it's a good salad.


serves 4 as a dinner salad and 8 as a side salad


Ingredients

1 bag prewashed arugula
1 head radicchio
2 cups quartered artichoke hearts in brine (from the deli section is optimal)
1/2 cup pitted kalamata olives
any other veggie you want to add--cherry tomatoes, chopped red bell pepper, etc.
bundle fresh mint
bundle fresh chives
bundle fresh dill
1 lemon
pinch salt
few grinds pepper

Process


Obtain a large bowl. Fill with arugula.

Half the radicchio. Slice each half into ribbons, then turn 90 degrees and slice the ribbons into ribbons. It's like delicious geometry homework!

Mix the radicchio and the arugula. Add the artichoke hearts. Pour in some of the brine (when I say "some," I mean "some." Use your intuition.)

Add the olives. Give a few good tosses with your hands. Looks pretty good, doesn't it?

Chop as much mint, chives, and dill as seems appropriate. Toss with the veggies. Add any other veggies you have.

Cut the lemon in half and squeeze one half on the salad. Toss with your hands. At this point, you may nibble an arugula leaf. Does it need more lemon? Squeeze on the other half (the Tipsy Crumpet likes a LOT of lemon).

Add the salt and pepper. Toss with your hands.

Now you have a fresh, gleaming, tart, tangy, and tender dinner accompaniment.

Notes


  • You could add some feta cheese. You don't need it, but it couldn't hurt.
  • If you're not crazy about feta but still want cheese, grate in some parmesan or asiago, using the larger grater holes so the cheese doesn't dissolve into the dressing.
  • This is a flexible salad. You can use other herbs, though chives, dill, and mint play well together and taste great with lemon. Basil would overwhelm the salad and hog all the attention. Oregano might taste too bitter. But mix and match and try anything you want. As long as you have brine, lemon, and salt, you'll want to keep eating until the last leaf is gone.
  • You really don't need other veggies for this salad. But if you're serving it as a dinner salad, garlic bread would be a terrific accompaniment. Slice a whole-wheat baguette lengthwise, smear with olive oil, and top with crushed fresh garlic. A few shakes of dried basil and red pepper flakes, a brief stint in the oven at broil, and you'll have a crunchy, pungent sidekick to your meal.

Verdict


This is a five-star salad.

Tuesday, July 22, 2014

Seven-Mango Layer Cake with Raspberry Filling and Mango-Rum Frosting (vegan)

I created this cake for an Earth day/birthday party. Super moist and fluffy despite the lack of eggs, the cake earned rave reviews from the non-vegan crowd. You need a LOT of mangoes to make this work, and the cake is somewhat labor-intensive, but it's worth it. It's like a vegan prima donna strutting her pulchritudinous self down a fruited runway.


serves an adventurous crowd

Ingredients

Cake


3 cups flour
4 tsp baking powder
1 tsp baking soda
dash salt
tsp cardamom
2 cups mango puree (see below)
3/4 cup almond milk (or other kind of non-dairy milk)
1/4 cup rum
2/3 cup canola oil
1 1/3 cups sugar
2 tsp vanilla

Raspberry Filling


12-oz package frozen raspberries
1/2 cup water
1/2 cup sugar
1 Tbsp lemon juice
3 Tbsp cornstarch dissolved in 1/4 cup water

Frosting


1/2 to 1 cup mango puree (see below)
1/4 cup softened Earth Balance
1/4 cup softened Tofutti cream cheese
2 cups confectioner's sugar (more as needed)
1 tsp vanilla extract
dash or so rum
raspberries and blueberries for garnish (optional)

Mango Puree (3 cups)

7 or 8 champagne mangoes
1/2 cup sugar
1/4 cup lemon juice


Process


Let's start with the puree, as you'll need it for both the cake and the frosting. 

Mango Puree


Peel the mangoes, then slice them. This is rather tricky with champagne mangoes, but you should be able to get off most of the flesh.

Put the sliced mango in a food processor. Add the sugar and lemon juice.

Puree until smooth. You may have to do this in batches.

You can make the puree ahead of time and keep it in the refrigerator, tightly covered.

Cake


Preheat oven to 350.

Oil two round cake pans.

Sift the flour, baking powder, baking soda, salt, and cardamom into a large bowl.

In another bowl, mix the mango puree, almond milk, rum, oil, sugar, and vanilla.

Tip the wet ingredients into the dry. With bold strokes, mix until batter is smooth. Don't overmix, lest you want the crumb to turn from silky to rubbery.

Pour equal amounts of batter into the two cake pans. Bake for 30-35 minutes, or until an inserted knife comes out clean. You may find a few golden crumbs clinging to your utensil. This is fine.

Let cakes cool for 10 minutes before turning them onto a wire rack.

Meanwhile, make the. . .

Filling

Pour raspberries, water, sugar, and lemon juice into a small saucepan.

Bring to a boil and simmer for 15-20 minutes, or until raspberry globules have freed themselves from the raspberry unit and mixed with all the other globules in a communal slurry.

Strain the mixture using a fine sieve. Pour the seedless communal slurry into the saucepan and return the saucepan to the stove.

Pour in the dissolved cornstarch solution and mix.

Bring the slurry back to a boil and simmer for 5 more minutes.

Remove from the heat to let it cool completely, stirring now and then. If the slurry becomes a gob of unspreadable raspberry goo, add a little water to thin it out.

When both cakes and filling are completely cool, spread the filling on one cake and place the other cake on top. We're nearly there!

Frosting


Cream vegan cream cheese and Earth Balance.

Add confectioner's sugar, whipping the two together all the while. If this takes too much coordination, alternate adding sugar and whipping.

Mix in the vanilla and rum. Take a swig of rum. You deserve it!

Stir in half a cup of mango puree. How's the consistency? Add more mango and/or confectioner's sugar as needed, tasting the frosting to make sure it's the tropical topping of your dreams.

When all is to your liking, spread the frosting along the sides and top of the cake until cake is completely covered. Only lick the spatula when you're suuuuuuuuure you're satisfied.

When the cake looks like a snowy mango bride, dot the frosting with raspberries and blueberries. Refrigerate until serving so that the frosting doesn't slump.

Notes


  • I used champagne mangoes, which are small and have a tart flavor that I like. If you go for a sweeter mango, such as Haitian or the larger, orange variety with the greenish skin, you'll probably need fewer mangoes for the puree.
  • When I made this cake, I did not believe that the frosting would be enough, and doubled the recipe (keeping the one cup of mango puree). This produced way too much. I then felt compelled to bake vegan chocolate cupcakes from Isa Chandra Moskowitz's Vegan Cupcakes Take Over the World, spread them with the frosting, and top each with a strawberry slice. Not a bad way to use any leftovers.
  • You don't NEED rum. But it's a nice addition, especially if you use the tarter mangoes.
  • It will take you at least half a day to bake and assemble this cake if you complete all the steps in one day. If you want, you can make the puree, frosting, and filling ahead of time.

Verdict


It's exhausting just to write about this cake, but it truly is worth it if you have a friend or loved one who requires some vegan cake magic. Especially nice during early spring, when everyone starts craving fruit.

"I am the mango cake monster who eats up all your time and resources. . . but everyone else will love me. Muhuhahahaha!"

Monday, July 21, 2014

Caramel Brownies

The recipe said to use drugstore caramels. Whaaaaat? The Toppled Chef would rather not bake brownies at all than use those waxy, corn syrup-laden squares that contain artificial flavor. A caramel should taste like caramel because it IS caramel, thinks the Toppled Chef. And so she created some ooey gooey drippy brownies with a panful of blood orange-infused caramel that tasted so ambrosial, it was like eating flower-strewn earth from fairyland. Bonus: the natural ingredients don't leave your esophagus feeling as if it's lined with plastic bags and your head aching with fake candy malaise.


This could serve a gaggle of adults and children.


Ingredients


Caramel


1 1/2 cups sugar
9 Tbsps salted butter, cut up into 6 pieces
3/4 cup heavy cream
1 tsp salt
Tbsp or so fresh juice from a blood orange (optional)

Brownie Batter


3 1/2 sticks butter (the other half-stick is the angel's share?)
heaping cup bittersweet chocolate chips
6 eggs
2 cups sugar
2 tsp vanilla extract
1 cup flour
pinch salt


Process


Butter (if you can stomach it) a 9 x 13 baking pan.


Caramel


Heat sugar in a medium saucepan over medium heat, stirring constantly with a rubber spatula. The sugar will clump up and turn golden-brown. Keep a close eye on it and note the moment it turns a pleasing shade of amber--the sugar will darken and calcify into a bitter mass in the blink of an eye.

Add the butter right away, being careful of spatter.

Stir the butter into the sugar until it is completely melted.

Drizzle in the heavy cream S L O W L Y, unless you want caramelized, inedible chunks of crystalized butter.

Allow the mixture to boil for one minute.

Remove from heat and stir in the salt. Squeeze in a few tablespoons of blood orange if you want. Rum would also be divine.

You can store the caramel in the refrigerator if you make it ahead of time. You may want to let it warm before using.


Brownies


Preheat the oven to 350.

Melt the butter and chocolate in a double boiler or the pan-within-a-pan-of-boiling-water used by the Tipsy Crumpet. Stir until just melted and let cool.

In a bowl, beat the eggs, sugar, and vanilla. Add the cooled chocolate mixture.

Sift the flour and salt into the chocolate mixture. Mix until well-combined.

Pour half the batter into the baking pan and spread until even.

Refrigerate for 10 minutes (you can make the caramel during this time).

Pull the brownie pan out of the refrigerator and pour the caramel on top. Depending on how gooey you want the brownies to be, you may want to use half the caramel and save the rest for later.

Refrigerate the pan for 20 more minutes to allow the caramel to set.

Pull the brownie pan out again and spread the rest of the brownie batter on top. Let the pan come to room temperature before putting in the oven.

Bake for 35 minutes, and then check for doneness.

Using the entire amount of caramel produced a fascinating oven phenomenon for me. A crackly crust emerged that was raised by a bubbling lava of caramel such that the brownie looked like a sacred tablet held aloft by a host. I baked for nearly an hour before declaring the confection done. Using less caramel may produce a more normal baking experience. When in doubt, if the caramel starts hardening and turning a darker shade of brown, it's time to pull out the pan. I promise the brownie will settle into a traditional form, although I can't promise that it will ever be tamed in spirit.

Pull the beast out of the oven and let it cool on a rack for a good long while.

You will want to refrigerate before attempting to cut these. Good luck!


Notes


  • You don't have to cut these. Spooning out brownie fluff will produce enticing caverns with caramel runoff.
  • You don't have to flavor the caramel, but orange, blood orange, rum, whiskey, and brandy would all add to the decadence.
  • A little of these go a long way. Best for a party or barbecue!

Verdict


5 stars--worth having to clean the crusty pan.


Coffee-Chocolate-Kahlua Ice Cream Pie

If the swelter of midsummer has you pining for an icy treat, pine no more! This boozy pie, with its caffeine punch and candy crackle, is like Good Humor for adults. I took Guy Fieri's coffee liqueur ice cream pie recipe and threw in some curveballs. The result is a tipsy mud pie you'll crave.


Serves 6-8. No one will eat just one slice.


Ingredients


Crust

1 box chocolate cookie wafers, crushed (I used MI-DEL's chocolate snaps)
5 Tbsp butter, melted


Pie


2 pints coffee ice cream, softened (on counter for 15 to 20 minutes)
2 pints chocolate ice cream, softened (on counter for 15 to 20 minutes)
6 Tbsp Kahlua
generous handful chocolate-covered coffee beans, crushed


Topping


1 cup heavy whipping cream
1/2 cup confectioner's sugar
1 Tbsp Kahlua
bittersweet chocolate bar for shaving
handful chocolate-covered coffee beans (optional)

Process


Preheat oven to 350 degrees.

Mix crushed chocolate cookie wafers with melted butter. Press onto bottom and up sides of a 9-inch pie pan. Bake in oven for 10 minutes. Let cool.

Combine softened ice cream and Kahlua using a mixer until creamy (you may have to do this in installments). Stir in crushed chocolate-covered coffee beans. Oh yes! Fill pie crust with ice cream mixture, cover with plastic wrap, and place in freezer for 3 to 4 hours.

Once the wait is over, whip cream with confectioner's sugar and Kahlua until soft peaks form (I do this with a hand mixer and inevitably end up spattering my walls, person, and nearby kitchen appliances with sugary foam). Top the pie with whipped cream. Refreeze for one hour.

Before serving, take a peeler and shave bittersweet chocolate over the pie. You may also top with chocolate-covered coffee beans.

Notes

  • I was afraid that freezing the whipped cream would cause it to slump into an unappetizing icy slurry. Not so! The whipped topping stayed good for days, and your pie will probably not last that long.
  • The crushed chocolate-covered coffee beans are key to elevating this pie to greatness, adding crunch and texture in concentrated bits of flavor. But you could do without in a pinch.

Verdict


5 stars plus. This will be the belle of the ball at any summer potluck. If you do what I did and serve slices garnished with mint and strawberries, prepare for those dainty embellishments to be ignored as your guests plow into the tundra.